

How To Repair Crack In My Front Bumper On 2001 Miata
Acquire tips on how to repair and bond plastic bumpers.
I accept been asked many times how to repair a plastic bumper cover. Then I fabricated this short article and kept it unproblematic without all the fancy long plastic names that manufacturers like to use.
I had the opportunity to run into Dick Jacobs, he was the founder of Duramix, the plastic adhesive repair company which was bought out by 3M a few years back.
Dick was i of us, a very simple focused man, constantly thinking about what innovation he could come up with for the Duramix product line and spoke in very simple terms only extremely thorough.
One day nosotros picked him up at the airport, we got in the car and I asked him a technical question. We collection in heavy traffic for virtually 45 minutes, had dinner for well-nigh two hours and then drove him to the hotel which was he was staying at. He got off the car and wrapped up the reply to my question virtually micro-spheres in SMC panels.
Everyone in the car that day got a very educational crash course nigh polymers, plastics, micro-spheres and SMC composition. The other lesson is never inquire a technical question to an engineer unless you have a lot of fourth dimension and annotation pads.
I am going to evidence you a simple method of repairing plastic panels and TPO bumpers.
1. There are only 4 types of plastic y'all should know nearly in the automotive manufacture.
- TPO - Sands in chunks, melts like butter with loftier speed grinders, feels similar wax and gets stringy when hot.
- Thermo-Ready - Flexible or Rigid, sands powdery, does non melt with loftier speed grinders and piece of cake to repair.
- SMC- Sheet molded Compound - New Corvettes accept it and looks like fiberglass with white powder. We will encompass SMC in another article.
- Poly propylene - RV Water Tanks, Dirt Bike Fenders - Not recommended for repairing or painting.
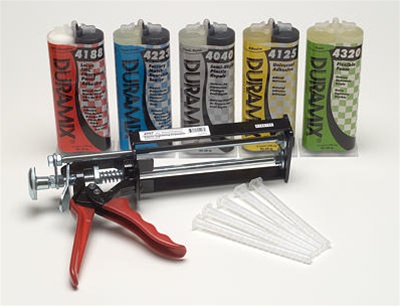
ii. Whatever Plastic Repair system you choose will contain these components.
- A cleaning amanuensis
- Adhesion Promoter
- A mixing gun applicator
- Adhesive/Fabric for the structure repair
- Mixing Tips
- Flexible contouring plastic and backing re-enforcement material
- Finishing By/Putty
iii. Lets talk about TPO Plastic. This is the most difficult plastic in the market to repair. It contains 3% to 5% wax based mold release within the material. And then that's the problem, how practice nosotros get adhesive or paint to stick to mold release? Many shop owners and technicians today will only rather not touch it and throw the bumper away. TPO is repairable, but you accept to take 2 precautions without exception. If y'all can fix TPO bumpers, you tin can fix the thermo set the aforementioned style, if you are non certain which of the two you have on hand, treat information technology like TPO. If y'all don't know what TPO stands for, it does not thing because with my system you lot don't have to know. Repair it like this and yous will exist fine.
- After y'all sand the repair area follow these cleaning steps, they are the central in repairing plastic bumpers successfully. Use a greyness or white scuff pad and scrub the repair area of the bumper or plastic panel with the cleaning agent start, a simple wipe is non going to work. Information technology may work sometimes but may neglect in others. Neon Bumpers may require two or 3 cleaning steps. The main reason bumper repairs fail is by not doing this footstep thoroughly. How practise you lot know the plastic is make clean? I utilize the water exam. If the water beads up like a freshly waxed car or just disappears off the plastic, clean it again, so try the process again until the water stays at that place moisture for a while.
Do not use sanding paste on raw plastic. Sanding paste is not part of the plastic repair system mentioned above nor solvent based wax and grease removers. These products volition contaminate the plastic. You will have mold release freshly activated by wax and grease remover solvents. That's not skilful. Always use the cleaning agent the manufacturer recommends.

- For this example I am going to use a bumper that has a nine" x 1/4" ripped hole shaped like a alphabetic character " Fifty " right in the centre of the corner. This seems to be a very common repair in the auto body industry.
- I use a small angle air grinder with a 2" 36 grit disc to sand off the rugged edges of the impairment until it is all shine and shaped like a bowl or a river. This way the structure adhesive has more surface area to grab. The edges period downward at an angle for 1/2". Some people refer to it as "bevel sand the edges" . Do non apply the V groove method because this is too narrow for the adhesive to grab. Picture the V groove but spread out over a proficient area like a bowl.
- Optional Step. Drill one/eight" holes in the surface area grooves about 1" apart, This will allow structural material to flow through the holes and make an H re-enforced repair with the holes interim equally rebar fillings.
- Back sand the front end and back with lxxx grit sand newspaper.
- Clean the repair again, in one case the console is clean, you have 30 minutes to apply your materials. Exercise not wait longer than that because the mold release will start to sally to the surface of the bumper. The faster yous get on it afterwards the cleaning the ameliorate your repair will be.
- Employ Adhesion Promoter on both sides and wait at least 10 minutes or what always the manufacturer recommends.
- Purge the 2 part cartridge before placing the mixing tip on. Later on placing the tip, purge about ii inches of fabric on a cardboard and make sure the material looks all one color.
Utilize structural repair fabric to a backing re-enforcement slice, enough to cover at least i inch around the back side of the repair. Apply the backing material piece to the dorsum side of the bumper and the let the textile ooze out through the holes and groove, and then gun some more material while it is all the same wet and place a contouring plastic on the top and spread it out using a spreader or your paw to match the contour of the bumper edges.
Wait 1 hour, then sand with low RPM speed.
Stop off with a Plastic Finishing Putty or filler.
This guide is generic in content and we recommend you follow the manufacturers instructions. Each manufacturer may comprise different recommendations in lodge for their product to perform the best.
Product Lines we comport for Plastic Repair
![]()

How To Repair Crack In My Front Bumper On 2001 Miata,
Source: https://www.autobodysupply.net/articles.asp?id=135
Posted by: stapletonentin1953.blogspot.com
0 Response to "How To Repair Crack In My Front Bumper On 2001 Miata"
Post a Comment